
15 Easy DIY Home Decor Ideas on a Budget
DIY Bedroom Decor Ideas
DIY Painted Headboard for a Cozy Bedroom
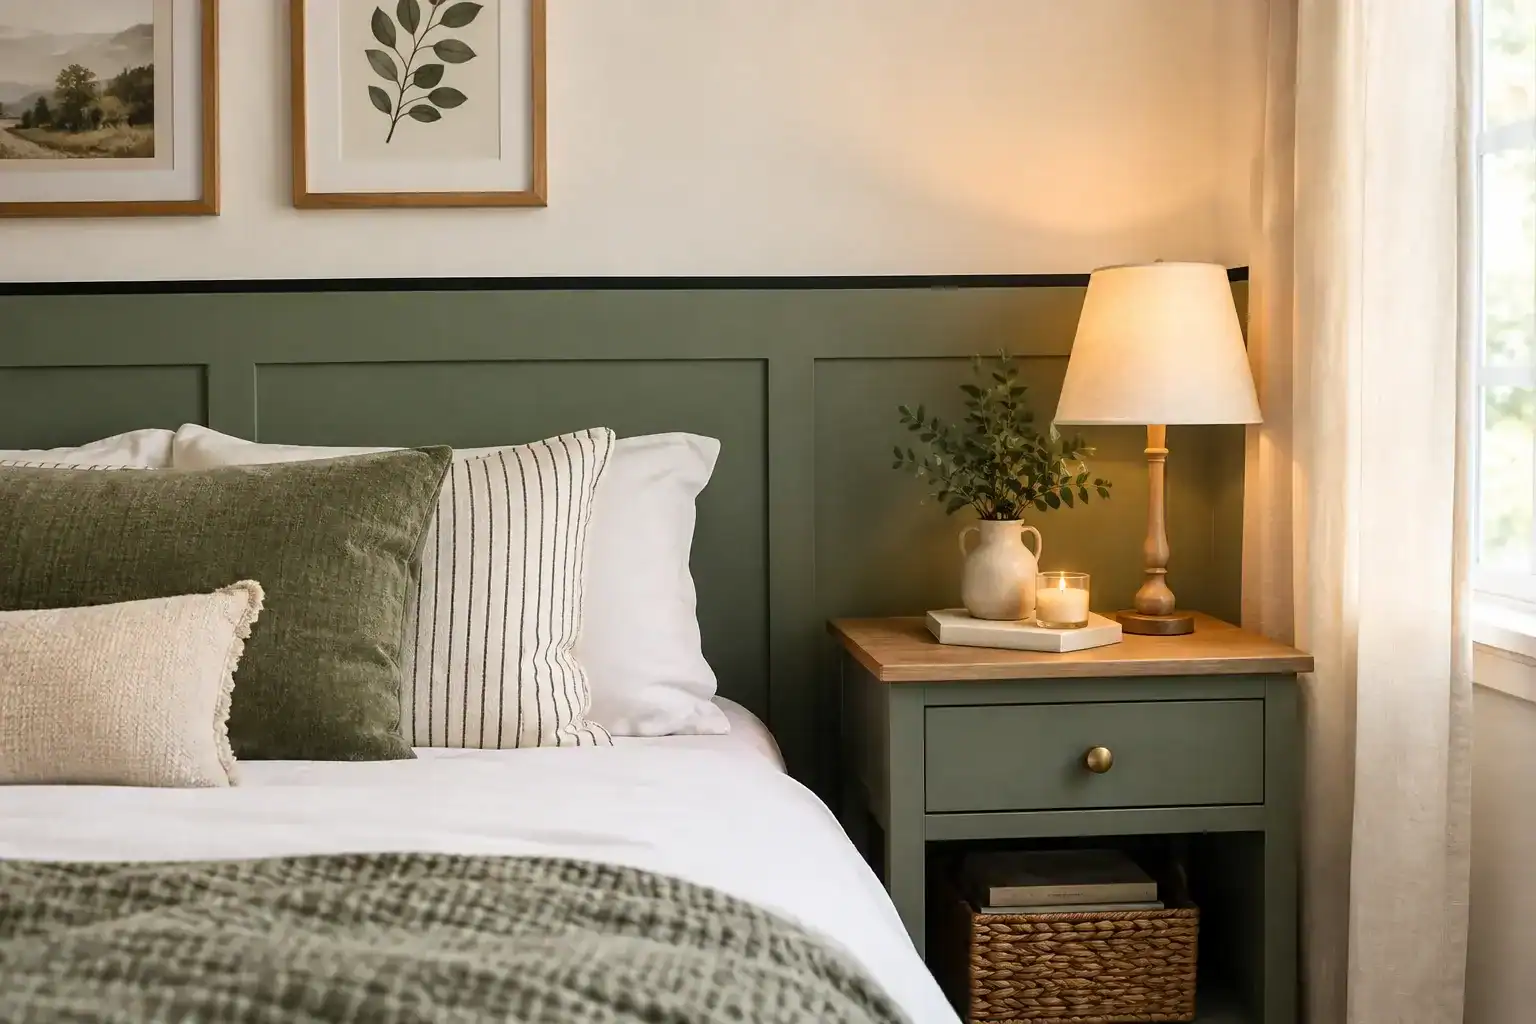
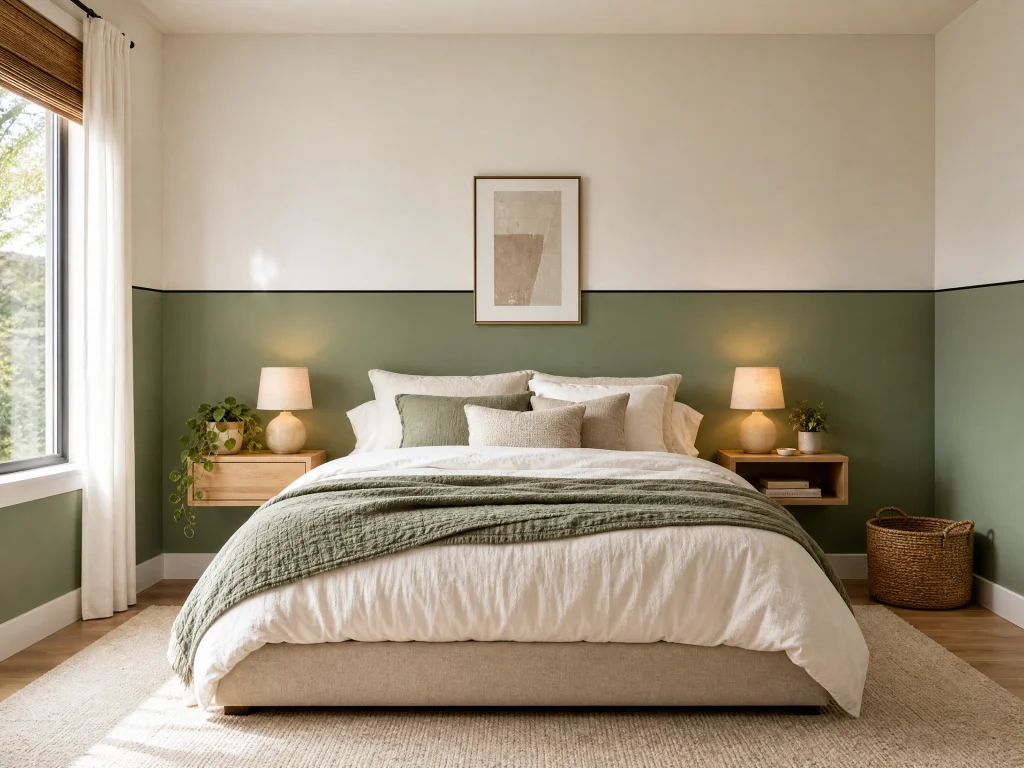
DIY home decor can make a bedroom feel more personal and inviting without requiring expensive furniture or major renovations. A painted headboard is a smart, renter-friendly way to create strong visual impact without buying new furniture. For a recent room makeover, I used a wall-to-wall headboard effect to give a smaller bedroom more character while keeping the project practical for rental decor. A cheerful green such as Farrow & Ball’s Breakfast Room Green, paired with creamy white, can make a green wall feel warm rather than overwhelming. This kind of bedroom decor works especially well in a small space, where thoughtful color blocking and a simple headboard design can make the space feel bigger. You can also explore low budget home design and these budget decor ideas for small spaces for more affordable home decorating inspiration.
To create the look, mark one-third of the way up the bedroom wall and add a thin black line approximately ¼” thick between the two wall colors. The black line gives the painted wall a crisp finish, while the white wall and green section create a balanced accent wall. Because a standard ceiling height can sometimes make a compact room feel closed in, this visual trick draws the eye upward and adds the impression of height. Whether you use a brush for painting or carefully plan the edges of the wall painting, this piece of interior design delivers polished DIY decor with minimal materials.
Create a DIY Painted Arch Accent Wall
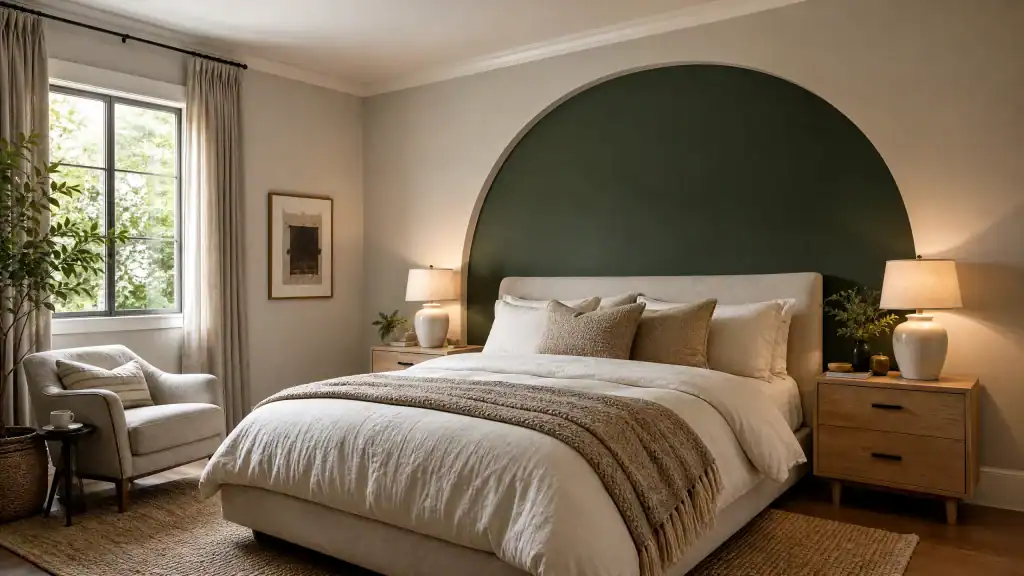
A painted arch can give a plain room the character of custom guest room decor without requiring a major renovation. I like how an Atlanta-based DIY enthusiast approach makes this idea feel achievable: choose a bold color, such as Behr Green Balsam, and use it to frame a bed, reading chair, or console. In a trendy guest room, the arch wall becomes a soft architectural detail, while a decorative arch adds depth and warmth to an otherwise simple gray interior.
For my own DIY home decor projects, I treat the shape as an accent wall rather than covering the entire room. The curved outline turns a plain painted wall into a memorable feature wall, giving the guest bedroom a welcoming focal point. With careful wall painting, clean edges, and a color that complements the existing scheme, this fun feature feels intentional without becoming overwhelming.
DIY Nightstand Makeover With Paint
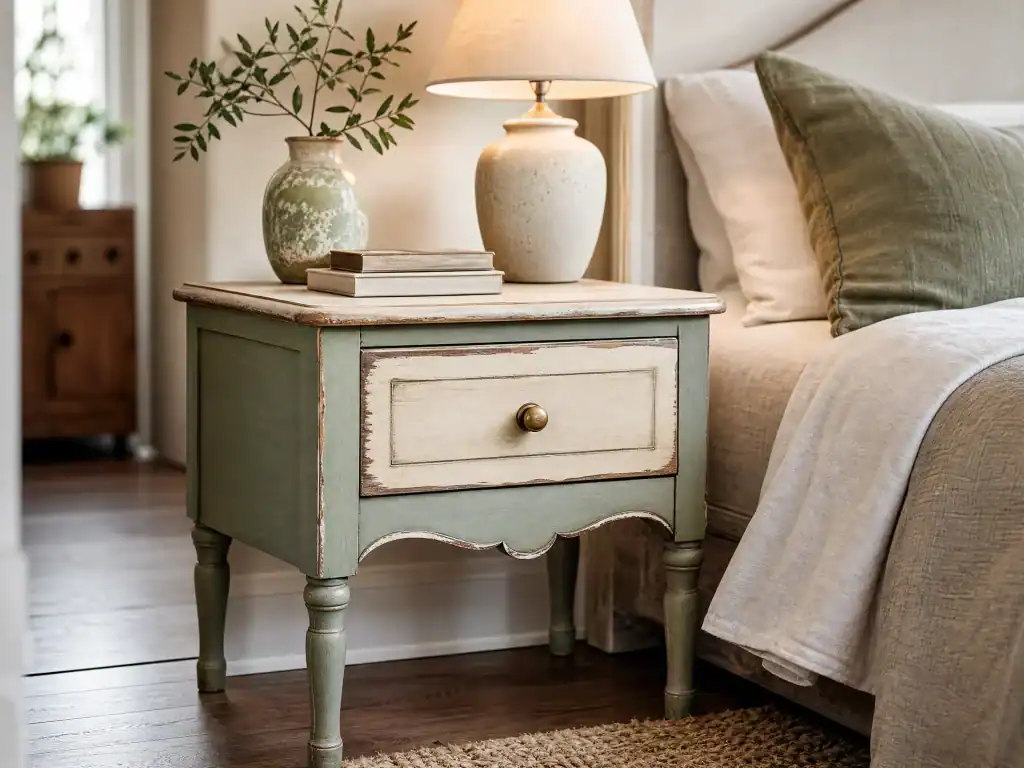
A tired nightstand or thrifted bedside table can become a standout piece of bedroom furniture with a simple paint transformation. I often use milk paint because it is inexpensive, forgiving, and ideal for refreshing thrifted furniture while preserving its character. With the power of paint, you can harness your inner artist and unleash a personal style—whether you want a calm bedroom decor accent or a bold bedroom show-stopper with genuine show-stopper appeal. The result can feel completely hand-me-down-worthy, even when the original bedside table had seen better days.
For a polished table makeover, clean the table, apply the paint in thin layers, and follow these faux-finishing tips to create dimension. A subtle faux-finishing technique or textured faux finish can make ordinary color resemble decorative painting, turning basic bedroom furniture into a refined furniture makeover. My best tips are to keep the brushwork intentional, coordinate the piece with the surrounding home decor, and leave the bedside surface practical. With a little patience, the maker can enjoy the confidence of an artist while giving a cherished hand-me-down a fresh role in the room.
DIY Living Room and Seating Ideas
Make a Cozy Crochet Pouf
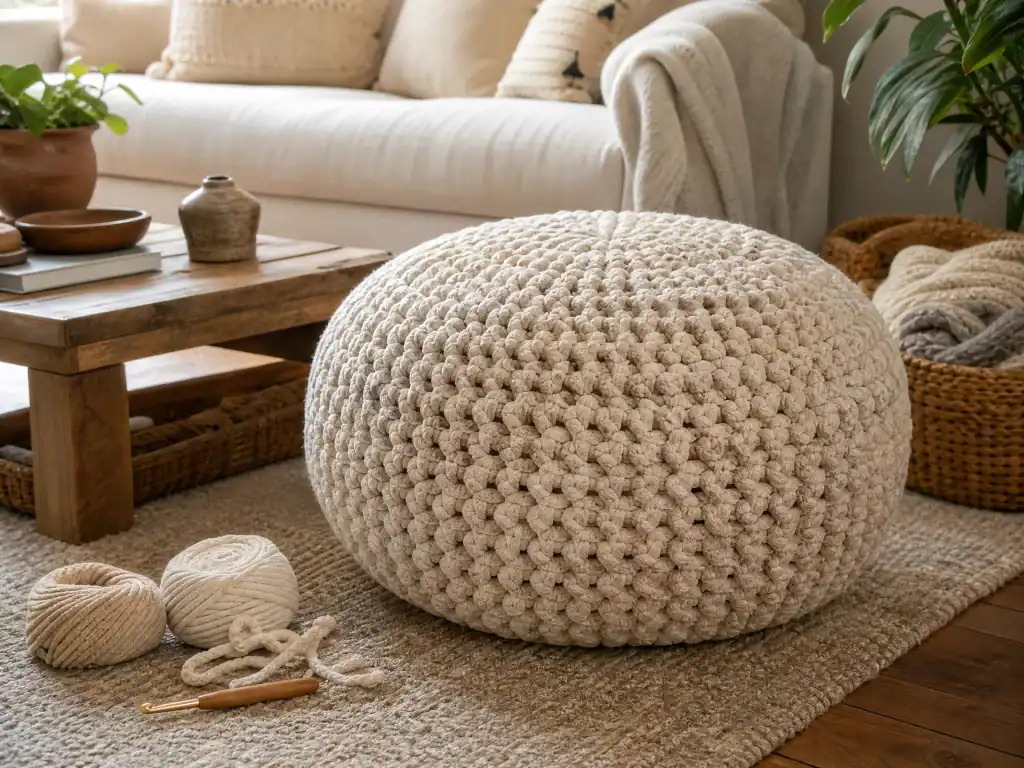
A handmade pouf can bring texture and personality to your living room decor without making the project feel expensive or complicated. I once found chenille yarn at a thrift store for an amazing price, then adapted a crochet pattern into a huge version that suited my space. The softest yarn and soft chenille gave this textile craft a comfortable finish, while the modified pattern helped me create a practical pouf for the living room. Using thrifted materials is an excellent way to save money on a creative project, especially when new supplies can be pricey; it also turns the process into a satisfying money-saving project that complements any home decor style.
For the crochet design, begin with a magic circle or magic circle crochet foundation, then work crochet stitches while you increase stitches during each round. Keep checking the number of stitches and the shape of every round until the piece becomes as wide as you want, then add several regular rounds before using decreasing stitches to close up the form. I filled the stuffed pouf with blankets and pillows from basement storage, adding various blankets, pillow stuffing, and blanket stuffing until the filling felt firm. Once the stuffing was arranged, the remaining stitches were easy to finish, creating a useful storage solution from items already sitting in the basement and turning this craft project into a warm, functional accent.
Create a Comfortable Banquette Backrest
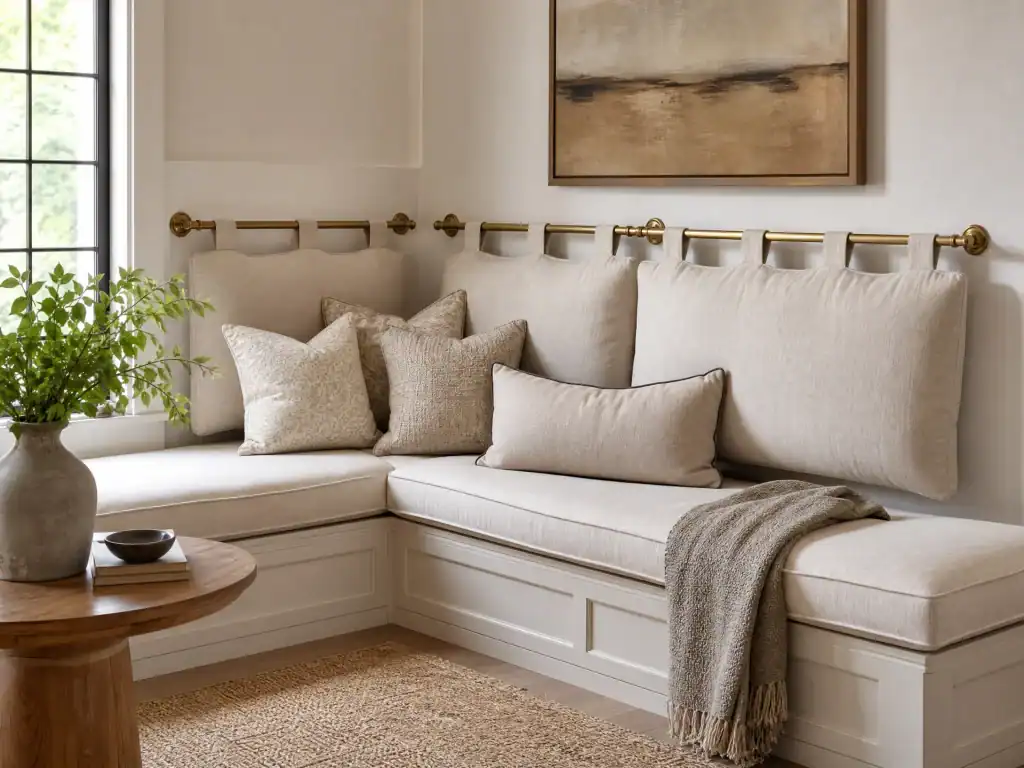
A banquette backrest is a simple way to make a neutral corner feel more inviting while adding useful back support to a seating area. Inspired by designer Ali Henrie, I like the idea of turning an unused wall into corner seating with cushions and suspended cushions held in place by brass metal drapery rods. This simple project works especially well for banquette seating, where soft backrests and a tailored cushion backrest can create a genuinely cozy corner without taking up much floor space.
For this DIY seating idea, install adjustable curtain rods or curtain rods at the desired height, then secure the brass rods or other metal rods firmly during the rod installation. The adjustable design makes it easier to fit different wall widths, while the rods also act as a practical window treatment detail. Choose decorative cushions that complement your neutral decor, and coordinate the fabric with the surrounding interior design and home decor. With a few sturdy rods, comfortable seating, and thoughtful upholstery, this project can turn an ordinary corner into a polished, cozy place to relax.
Build an Easy DIY Entryway Bench
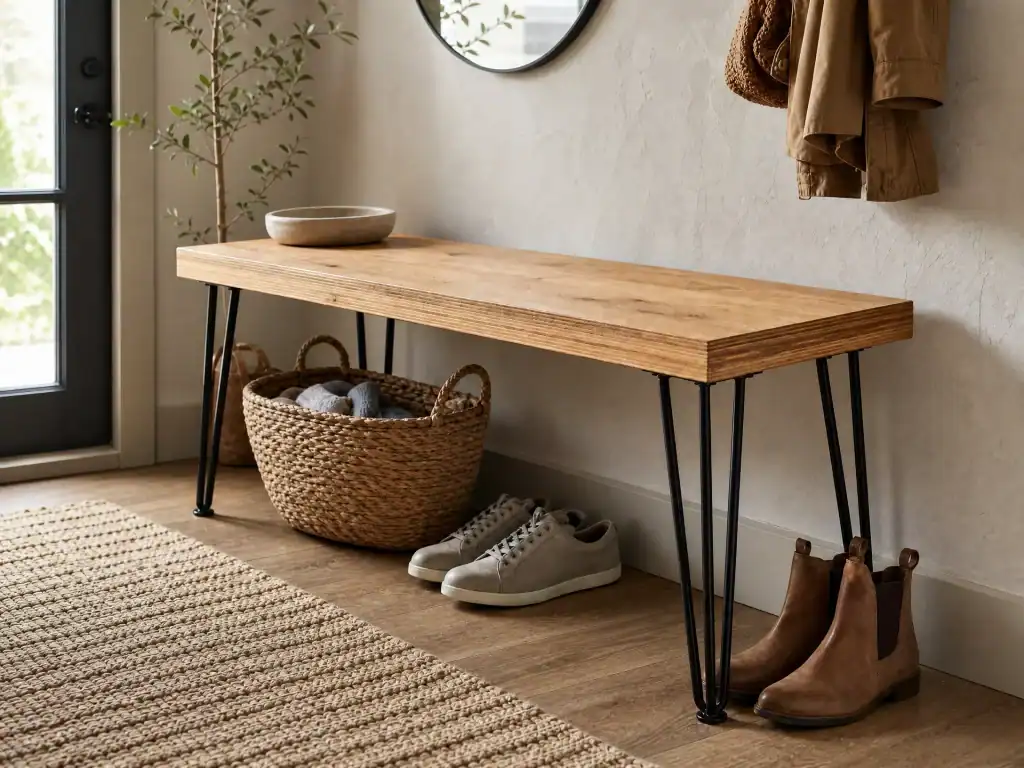
An instant bench is a practical DIY bench that can transform an empty entryway into a useful shoe-tying spot. For this furniture project, I used a piece of laminated shelf pine and attached hairpin legs to create a clean-lined handmade bench with minimal tools. The combination of laminated wood, shelf pine, and a sturdy bench seat gives the design the look of custom hairpin furniture, while the compact shape works beautifully as an entryway bench and shoe bench.
For a straightforward bench construction, measure the piece of pine and attach legs evenly beneath the shelf or laminated shelf. This simple form of woodworking creates useful entryway storage without making the space feel crowded. I especially enjoy projects made with my own hands because they make everyday seating feel more personal; once the bench is complete, it offers a convenient place to put on shoes and practice shoe tying. The simple design is easy to make, and the finished result feels genuinely accomplished.
DIY Kitchen Decor and Organization Ideas
Create a DIY Live Edge Breakfast Bar
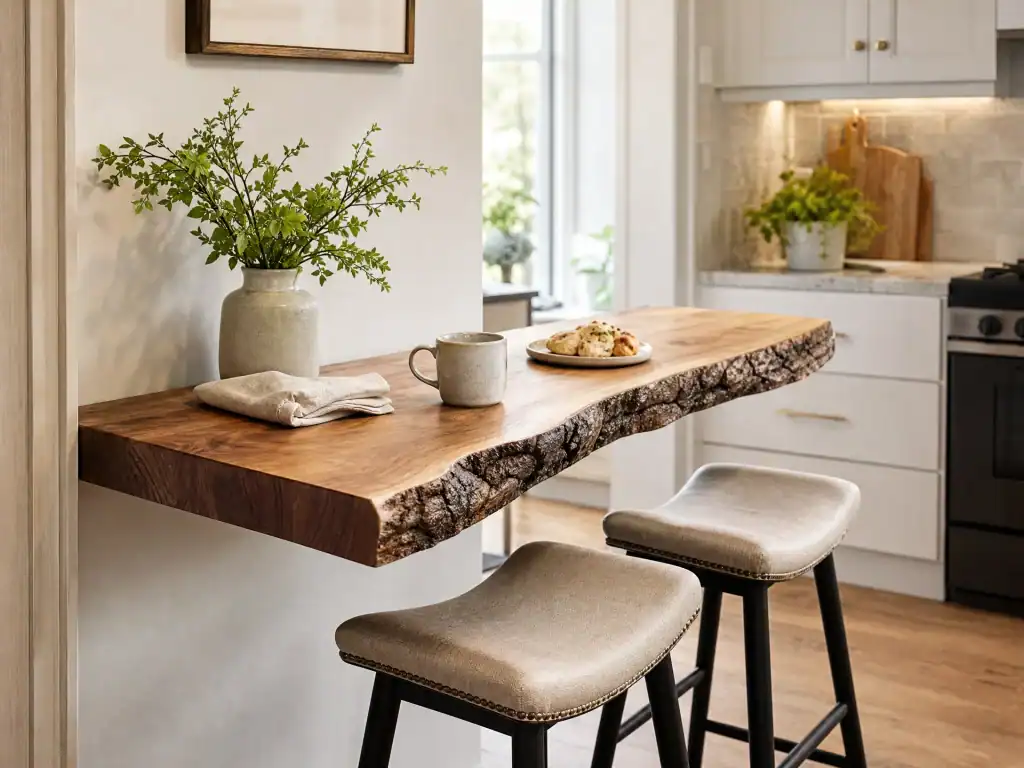
A live edge shelf can turn an unused corner into a practical breakfast bar without the bulk of a full renovation. Inspired by the work of Jenni Yolo of I Spy DIY, I like using live-edge wood with a DIY floating shelf kit to create a warm, natural eating space. The organic edge of the wood shelf adds character to the kitchen decor, while the compact design provides an extra surface for serving, dining, or preparing meals. It is an especially useful idea for a cramped kitchen, where a space-saving shelf can make the room feel more functional.
For this home improvement project, choose a sturdy wooden shelf or simple shelf, then secure the shelf kit carefully to the wall. A floating shelf, corner shelf, or narrow wall shelf can extend the available kitchen surface without interrupting the flow of the room. Depending on the layout, the DIY shelf can create a small breakfast nook, a casual dining space, or a dedicated eating area beside the bar. This kind of interior decor keeps the designed space open while giving the kitchen a useful surface that feels intentional rather than crowded.
Create a Stylish DIY Coffee Nook
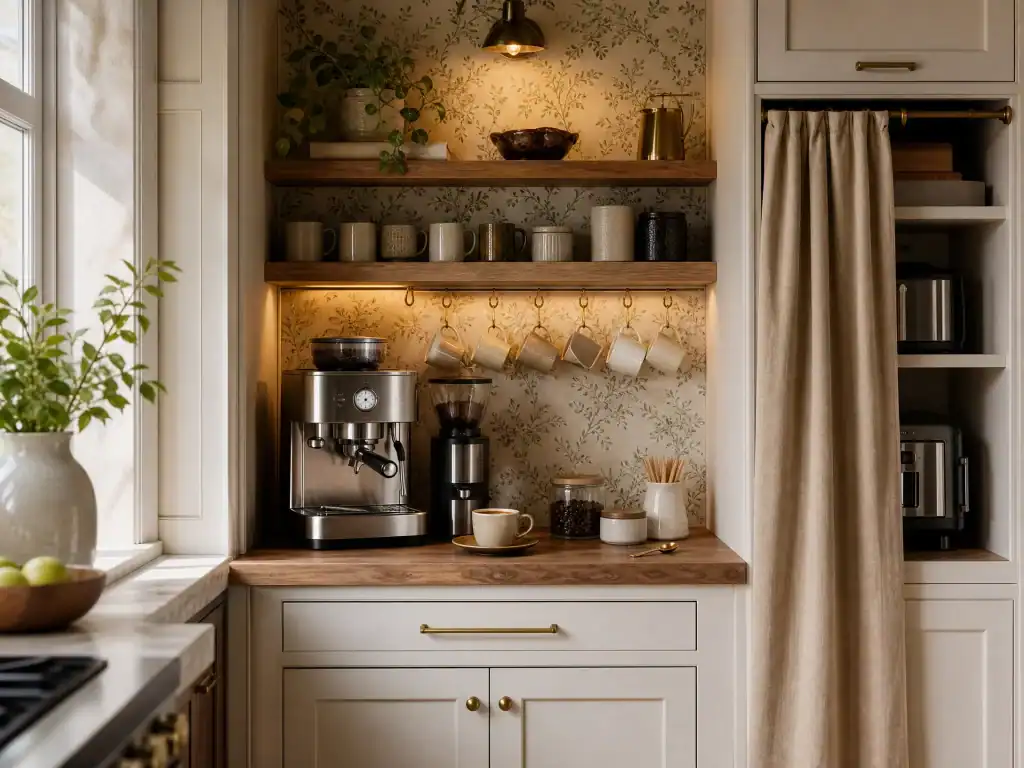
A dedicated coffee nook can bring everyday elegance to your morning routine while making the kitchen feel more intentional. Inspired by designer Ashley Gilbreath, I like combining built-in shelves with a compact coffee station, turning an unused corner into a welcoming coffee corner or kitchen nook. Add whimsical wallpaper or decorative wallpaper for a subtle touch of drama, then arrange mugs, a mug, stirrers, and a single stirrer within easy reach. This simple DIY coffee station can function as a stylish beverage station, a practical coffee bar, and a beautiful piece of home decor at the same time.
To keep the coffee setup organized, use built-in storage, mug storage, shelf storage, and dedicated appliance storage for the machines and each machine. I prefer placing the larger equipment behind a curtain, keeping the cords and every loose cord out of sight with smart cord management. Whether you call it a nook or a coffee station, the finished arrangement keeps the worktop clear while giving the room a personalized decorative layer.
Add Personality With Colorful DIY Glassware
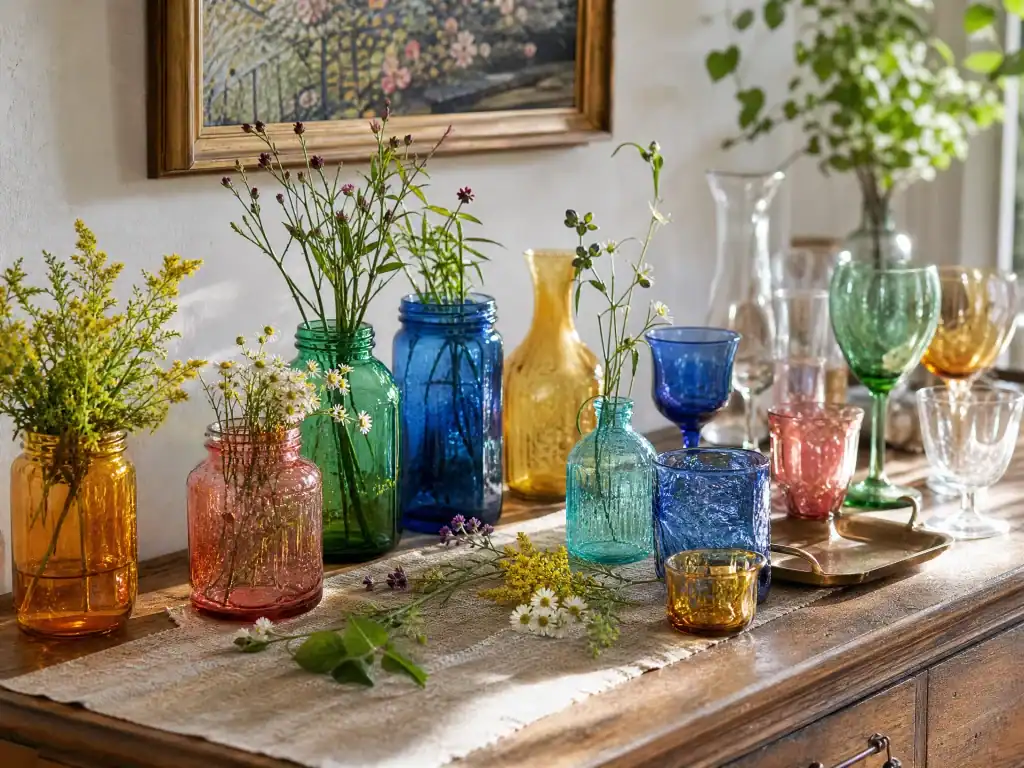
Refreshing everyday pieces with colorful glassware is an easy way to add personality to your home decor and table decor. I like starting with old clear jars, clear jars, or old jars, then using glass painting to create a charming vintage look. With a little color, ordinary glass containers become colorful jars, while colored glasses and colored glass bring a cheerful glow to the room. This simple DIY glassware project is also a practical jar makeover that gives new life to items you may already have at home.
Once the paint dries, use the finished pieces as bud vases, a bud vase, glass vases, or flower vases, or display them alongside wine glasses, a wine glass, drinking glasses, and a drinking glass. The collection can include vintage glassware, decorative glassware, and other decorative items for a relaxed vintage decor arrangement. Whether you call it drinkware, decorative glass, or simply glassware, the mix of jars, clear glass, colorful decor, and charming handmade details makes the display feel
personal and inviting.
DIY Pet and Bathroom Home Decor Ideas
Build a Practical DIY Dog Feeding Station
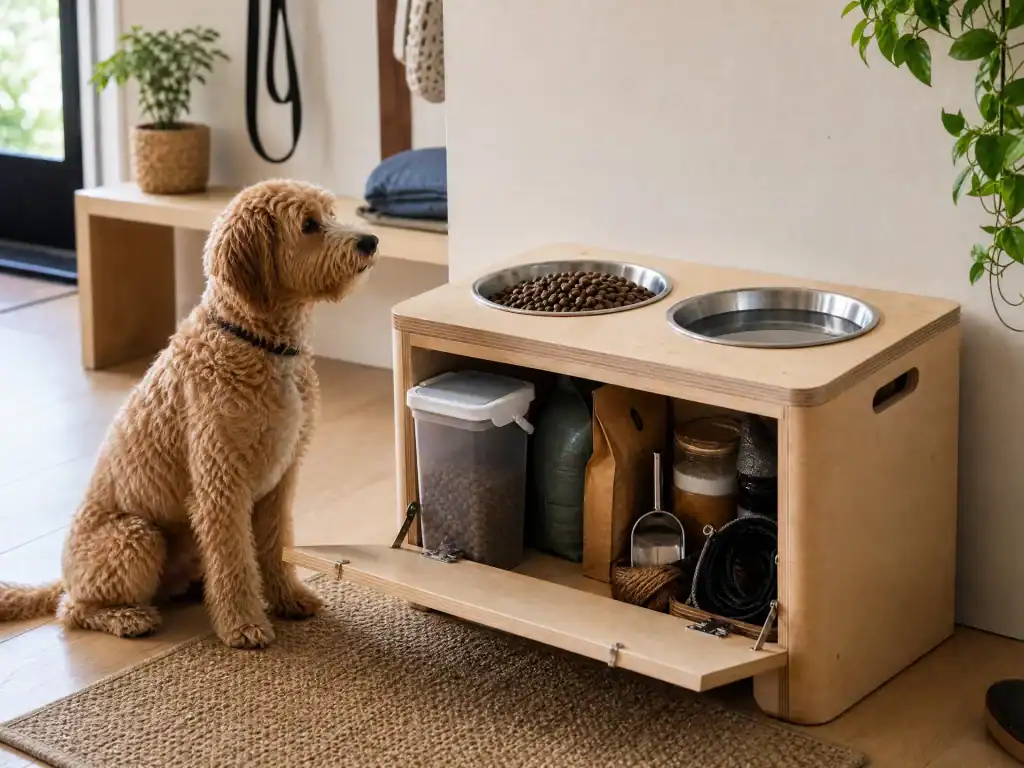
A compact dog feeding station can make everyday mealtime cleaner while giving your pup a dedicated feeding area. With basic woodworking skills, a sheet of plywood, and a few simple tools, you can build an elevated dog feeder that doubles as a practical pet station. I like using plywood for this kind of woodworking project because it is affordable, easy to customize, and strong enough for a busy dog and its feeding station. The raised design keeps dog food and kibble at a comfortable height, making the setup more convenient for your best friend.
Add a pull-down front to create hidden storage for favorite snacks, snacks, pet supplies, and extra dog food. The hinged front neatly conceals the supplies, while the pull-down feature gives quick access whenever you need to refill the meal station. This DIY project provides handy storage without taking up much room, and you can adjust the elevated height, sheet dimensions, and finishing details to suit your pet. With the right skills, it is easy to make a functional station that keeps every favorite treat organized.
Create a Relaxing Teak Wall Tile Bathroom
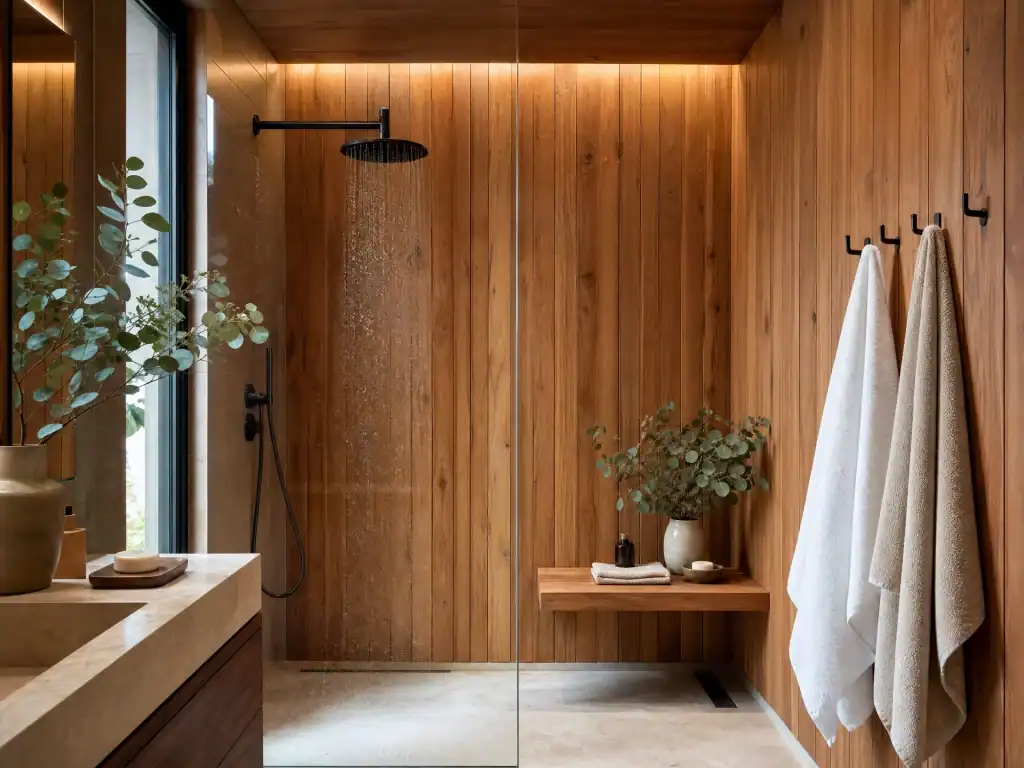
You can turn an ordinary bathroom into a zen-like escape with warm teak wall tiles and a few thoughtful details. Inspired by Amy Leferink of Interior Impressions, I like combining teak panels with natural eucalyptus or an eucalyptus plant to create a relaxed spa bathroom atmosphere. The rich texture of teak wood adds depth to the bathroom decor, while wall panels, decorative panels, and carefully placed wall tiles give the shower interior a refined, natural finish. Even a small shower wall can feel completely transformed with this simple bathroom renovation idea.
For the installation, apply tile adhesive or suitable adhesive to the teak tiles, then secure them carefully during the tile installation process. Add a built-in shower bench or a simple bench, and use hooks or towel hooks to hold fluffy towels and extra towels. This practical home improvement project makes the shower more functional while giving the room a polished bathroom makeover. Once the wall treatment is complete, you can hang towels near the bench and enjoy a calm zen bathroom with a natural shower decor finish.
Create a DIY Striped Bathroom Accent Wall
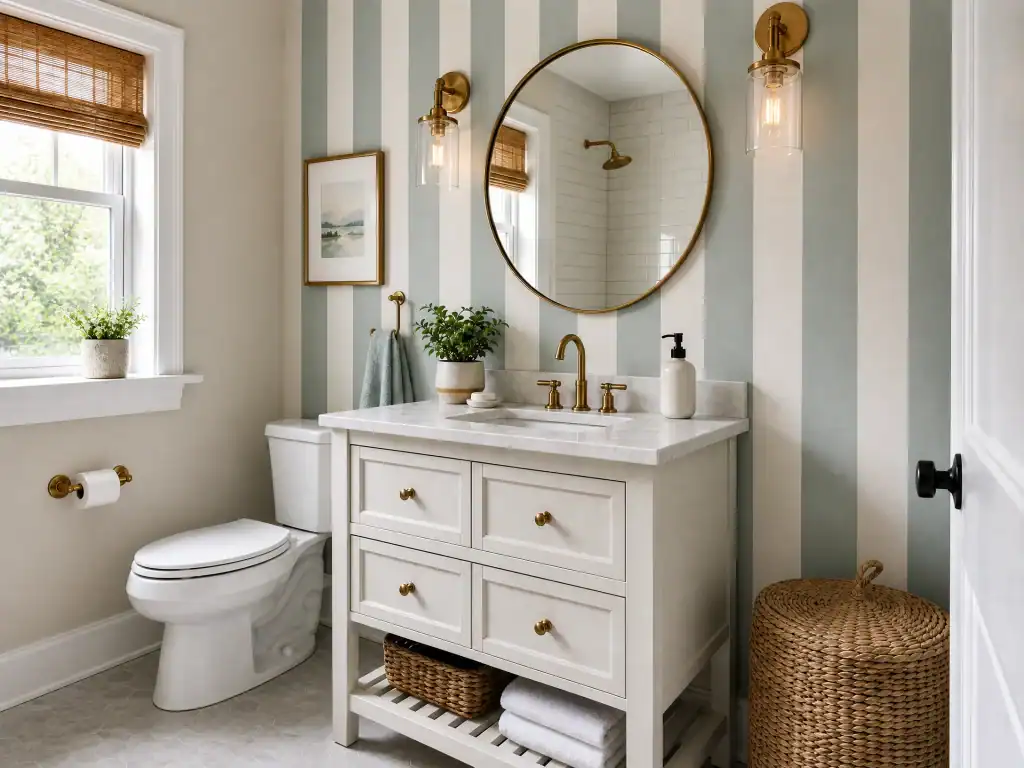
A striped bathroom wall can give a plain room a playful bathroom makeover without demanding a full renovation. For an adorable striped bathroom inspired by designer Audrey Scheck, I would use painter’s tape to map out clean wall stripes before opening the paint. This approach works especially well in a family bathroom, where a cheerful stripe pattern can add personality while keeping the overall bathroom decor fresh and simple.
Start by measuring the wall and applying painters’ tape in straight, evenly spaced sections. A roll of 1-inch-thick tape helps create consistent lines, while white paint produces crisp white lines against the base color. The result is a graphic striped wall that works beautifully as an accent wall and brings a custom feel to the room. I especially like this idea for a daughter’s bathroom because the design feels adorable without becoming overly childish.
The most important step is sealing the edges before painting. Apply a thin layer of caulk along the tape borders, then allow it to dry before beginning the wall painting. This simple process helps prevent bleeding and keeps the decorative lines sharp. Once the paint is dry, remove the tape slowly and inspect the stripe pattern for any areas that need minor touch-ups.
With careful preparation, this DIY bathroom project can make the entire bathroom feel more intentional. The combination of striped, white, and neatly finished edges creates a polished bathroom design, while the controlled caulking technique gives the wall stripes a professional appearance.
DIY Wreath and Seasonal Decor Ideas
Make a Living Plant Wreath
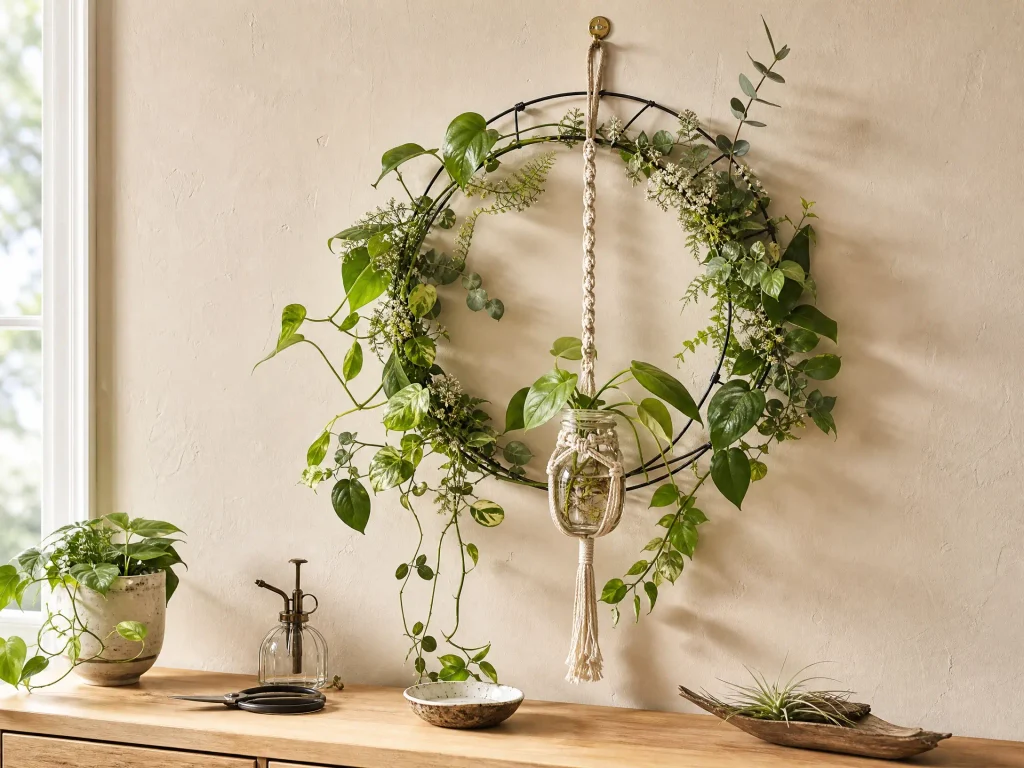
A living wreath brings a fresh, organic touch to home decor by combining houseplants with an artistic natural wreath design. For this project, I used a wire wreath form, a macrame holder, and a half pint jar to create a simple hanging planter. The glass jar holds water for propagation vines, while woven vines and plants create a beautiful plant arrangement around the base. This form of indoor gardening is an easy way to add living plant decor, green decor, and floral decor without buying a traditional flowerpot wreath.
To build the arrangement, place the propagation cuttings in soil or use soil planting for a flowerpot, then guide the vines around the wreath form and secure them with wire. Regular plant care is important, so remember to monitor the water, handle water maintenance, and keep replenishing water when necessary. I enjoy this DIY wreath because it offers a natural alternative to fake silk flower wreaths and artificial silk flowers. With gentle taking care, the woven greenery develops a complete look, turning a basic wreath and jar into a living decoration that feels more personal than a store-bought botanical wreath. The macrame, houseplant, and flower details make the finished design both practical and attractive.
Create a Painted Pinecone Wreath
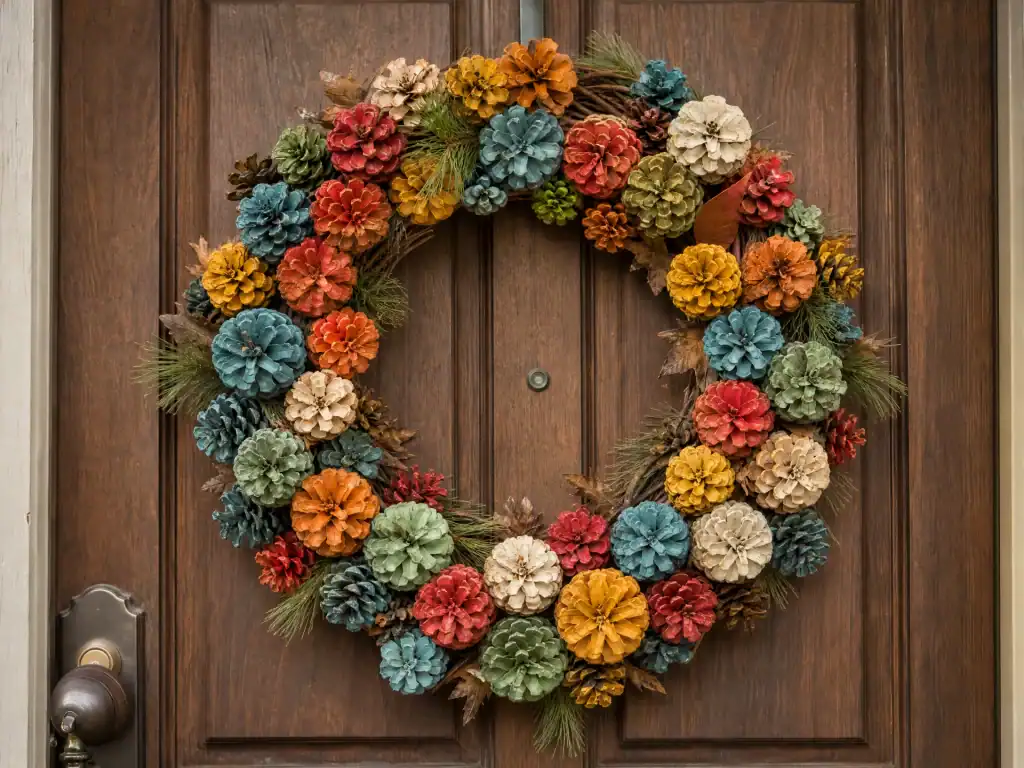
A painted pinecone wreath is a cheerful way to bring bright seasonal character to your doorway using natural materials. I first discovered the idea on Pinterest, then collected pinecones from the neighborhood and selected a sturdy grapevine wreath form for the base. Each pinecone has a natural flower shape in its middle section, creating an attractive floral shape that makes this DIY wreath feel more detailed than it is. As a fair warning, preparing every cone requires patience: use garden pruners or a sharp pruner to chop off the top and bottom, and expect your hands sore if you work for too long.
Once the wreath form was ready, I used acrylic paint to cover each flower, adding extra acrylic during the painting process wherever the color needed more depth. After the pieces dried, I hot glued them to the grapevine base with plenty of hot glue for a secure hold. Before gluing, try placing flowers around the wreath to make sure you have enough pieces for balanced coverage. The finished craft decoration combines painted details, natural garden materials, and handmade DIY charm, giving this pinecone wreath a welcoming personality.
Make Painted Candlestick Decor
A painted candlestick project is a simple way to turn ordinary candlesticks into charming house decoration. I enjoy using acrylic paint for candle painting because it adheres well to white taper candles and allows plenty of room for creative paint details. Whether you are making a single candlestick or several painted candlesticks, this DIY craft works beautifully as a craft night project, a group project, or a relaxing DIY activity. The finished elegant candles and lovely candles can add a personal touch to any room.
Painting a small round surface can be slightly tricky, so steady the candle on a flat round surface or other small surface and work slowly with a fine paintbrush or brush. You can choose white, any color, or a layered color scheme, then add acrylic, paint, and carefully placed details for a unique finish. If you plan to burn candles, keep the decoration away from the wick and flame, and remember that burning candles require proper supervision. For an alternative finish, use melted candle wax or extra candle wax to create raised accents, adding texture while preserving the relaxed, handmade character of the project.

Creative DIY Musical Instrument Decor
Create a Painted Bass Guitar
A painted bass guitar can become a striking piece of musical home decor when an old instrument needs a little personality. I once worked on a scratched-up guitar that was inexpensive but full of potential, using acrylic paint to create a colorful floral design with delicate flowers. This simple guitar makeover transformed the bass guitar into a personalized music instrument, while the DIY guitar approach helped spiff up a cheap guitar without replacing it. The same idea can also work on an electric guitar or electric bass, especially when the goal is an expressive instrument makeover rather than a factory-perfect finish.
After the paint dried, I added Mod Podge as a protective seal and applied a clear sealant over the design. This extra layer created a durable paint finish, strengthened the seal design, and made the guitar decoration more resistant to everyday use. The scratched surface disappeared beneath the acrylic, while careful sealing helped the artwork stay intact. The finished painted guitar has held up amazingly well after a couple years of playing with our church worship team and worship team, making it a meaningful part of our church music and a lasting example of creative worship decor.


2 Comments